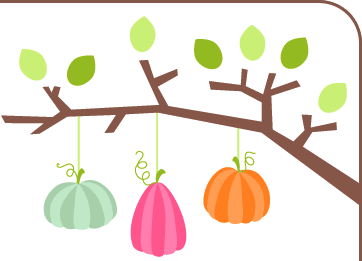
This will be one of three cards that we will be creating in my Winter Kids class on Oct 29. If you are in the Yosemite area and want to take a class e-mail us at: catsmeow (at) sti (dot) net
See you soon,
My card was inspired by the card to the left. I don't know who made it, but I knew I liked it and saved it in my inspiration file when I saw it. If you know who might have made it, please let me know so that I can give proper credit. This is another great reason to watermark your photos, ya never know when someone wants to give you a little shout out. :)
Posted by Melissa at 7:32 AM 5 Comments Click Here To Comment
Labels: 3D, Class Projects, Copics, Stampendous
Posted by Melissa at 7:00 AM 1 Comments Click Here To Comment
Labels: Class Projects, Copics, Prismacolors, Stampendous, Tombow
Posted by Melissa at 6:00 AM 4 Comments Click Here To Comment
Labels: Bo Bunny, Cards, Class Projects, Copics, Printworks
Posted by Melissa at 12:00 AM 2 Comments Click Here To Comment
Labels: Cards, Class Projects, Penny Black
Stamps: Partridge in Pear Tree (Stampendous) Cardstock: Racy Raspberry, Deep Green (Treasures by Worldwin), Neenah CC Natural Ink: Memento Tuxedo Black Extras: Copics, Spica Glitter Pens, Divine Swirls CB EF, Petite Oval Classic and Scallop Nesties
Posted by Melissa at 3:45 PM 3 Comments Click Here To Comment
Labels: Cards, Class Projects, Copics, Nesties, Stampendous
Today I have a sneak peek to share with you. I will be heading to Green Tangerines in Rocklin, CA next Saturday to teach a group of gals about Copic Markers. After a bit of time learning about the markers, they will complete one card using the Whoooo Owls from Stampendous and one using the Santa Gift stamp from Hero Arts.
Posted by Melissa at 7:58 AM 1 Comments Click Here To Comment
Labels: Class Projects, Hero Arts, Stampendous
Here are the cards that the gals made in my class today. For each card we used a couple of butterfly punches from EK Success. The designs are simple, but we used some sort of fun tool on each one.
For the Raspberry/Vine card I had them stamp the vine with Lettuce Adirondack ink and then color the leaves with Copic markers (YG03 and YG05). The small butterflies were punched out of Dark Racy Raspberry cs from Worldwin and the large ones were punched from SEI's Brigeport collection. The large butterfly in the middle is the reverse side of the paper from the other two. For the berries we used some little metal stickers from ??? (I will look on Monday and let you know) These happen to be berry colored but they come in gold, silver and probably other colors too! A little bit of stickles was used on the berry colored butterflies for added bling.
For the next card, I cut Hillary Bazzill cardstock into 4Bar sized cards (3 1/2 x 5) and we ran it through the Cuttlebug using the Leafy Branch embossing folder. We had to run it through once and then scooch the folder over a bit to get the full width of the card. The butterfly was mounted onto an inchie square that had been stamed with a background image in Lettuce ink. It was then placed on the berry panel and attached to the card. A little clear gem was added for the head of the butterfly. There is a white panel with the small butterfly punched out of the corner on the inside of the card.
For the last card we scored 1/8" around the white panel (it is hard to see in the pic) and then layered to the Hillary panel and then to the white card. The butterflies are from the SEI Brigeport collection also. "Amazing Friend" (Hero Arts) was stamped in Cranberry Adirondack ink.
It was a fun class and the ladies were all great! I just love them all!
hugs,
Posted by Melissa at 5:38 PM 1 Comments Click Here To Comment
Labels: Class Projects, Copics, Cuttlebug, Inchies
Happy Friday! These are the 3 cards that I will be teaching at The Cat's Meow tomorrow. All of the stamps are from the Hero Arts Birthday Frame and Messages set. You can get it here. For the cupcake and slice of cake cards, I used Copics to color the images. On the party hat, I used Prismacolor Pencils. Well, I gotta run............I have to finish cutting/packing my kits.
If you have any questions about any of the cards, leave me a comment and I will fill ya in!
hugs,
Posted by Melissa at 12:01 AM 1 Comments Click Here To Comment
Labels: Cards, Class Projects, Copics, Hero Arts, Prismacolors
Man o' man have I been busy. Today I went to town and visited with my Mom and sister. One of the first things my sis said was "you need to update your blog", so Sis....... this post is for you.
This is the last of the Bling cards that the gals will be making in Saturday's class. The base card is brown cs from Worldwin and then a layer of orange Worldwin cs. The print paper is Beloved Blooms from My Mind's Eye's 29th Street Market collection. I think these papers were some of my favorites from CHA. I stamped the Dot Flourish and Butterfly stamp (both from Inkadinkado) in brown ink on cream cardstock. I stamped the butterfly a second time, painted with Twinkling H20's and cut and layered to the butterfly on the cream panel. The words (from Penny Black) are stamped in brown ink also. I finished off the card by adding Poppy colored rhinestones from MAMBI.
I have a few more pictures edited and ready to go, but it's getting late and I can't keep my eyes open anymore. Stay tuned!

I almost forgot I was going to post pictures of the other cards for my "Bling" class. This is the 2nd of 3 cards that the gals will be making. For this card I started with some dark pink Bazzill cs for the card. I embossed one of the Dot Flourishes from Inkadinkado with Agean Silver EP from Judi-kins on white linen cardstock and layered it to a silver panel. I added a couple of Primas and some MAMBI rhinestones. Clipped the corners of the silver and white layers with my 1/2" circle punch.
Tomorrow I have to work, but I have the 3rd card in this series to share with you, so I will upload it after work.
from my new camera. I am still learning how to use it and need to read the book completely and figure out all of the things I can do with it. (I really need to learn this before I go to CHA). These are the cards for my upcoming class. One of my new favorite stamp sets is Boho Blossoms from My Favorite Things and you can get them here. On this first card I embossed the flower in detail gold powder directly onto the print paper. This paper has a shimmer to it and it is gorgeous. The base card is brown shimmer cardstock and the print papers are from SEI. I embellished with some pale pink dew drops. It is hard
to tell, but the shear ribbon has a little gold edge. Here is a close up of the flower/dew drops. The next card uses the open heart image from the set and I used World Win cardstock for the base and K & Co. Smitten paper for the
background. I used Pink VersaColor ink for the flower and embossed with clear EP. I flower is stamped on cream glossy cardstock as I thought it really went great with the print on the paper. Now, this last card is my oh so favorite! I stamped the solid flower image with Black Brilliance ink and embossed with black EP. The base card is Bazzill Black cardstock and the print papers are from K & Co.'s Mira collection. I used Adirondack Mountain Rose ink to stamp the little design directly onto the print paper. The solid cardstock is from World Win and the color is called Geranium. It goes perfectly with the print
paper. I embellished with some brads and a little yellow rhinestone in the center of the flower for some extra bling. Well, I am off to work (we're doing inventory) for the evening. I hope to upload a few more cards tomorrow.
Hugs to all!
I recently taught a class on fun folds. You know we get in a rut and do the same standard folds all too often. Let me start by saying, I am nuts about surfing the web for ideas. This first card I have seen called Joy Fold card and you can find the instructions here. It is kinda hard to see in this pic but I stamped the pinecone stubby stamp from Stamps by Judith on the left fold of the card and the pine sprig stamp also from Judith on the right side of the brown Bazzill card. I stamped the pine sprig again in green on the larger cream confetti layer that Iused under the main image layer. The main image pinecone is from Inkadinkado and I just love it! Actually I have always liked pinecone stamps. Wierd! It is hard to tell, but the pinecone and pine branches are covered with Diamond Stickles. The next card is a double pocket card and although it uses a
whole sheet of 8 1/2 x 11 cardstock, the results are worth it. For this card I used SEI Mistletoe cardstock, a flourish from my Fancy Pants Bella Brush set and the Hero Arts Flourish Frame
and Many Birds stamps. I used Brown VersaColor Ink and Lettuce Adirondack in for the tree and pot. I found the idea for the tree and pot in the Hero Arts Fall Supplement. I used Vanilla Versacolor ink for the flourishes on the tags. It is also hard to tell on this card, but I used Diamond Stickles on the tree and on the swirls on the pot. I can't remember where I saw the instructions for this one, but If I have time tomorrow, I will upload a tutorial for you.
Okay, so it is not really a bird. I did use the Feather Flourish set from Stampendous to make it though. This card was inspired by a card I saw here on the net. For my card I used Bazzill cardstock for the base card and lavendar layer. For the image panel I stamped the flourishes with Lettuce Adirondack Ink. I stamped the leaves and print petals on scrap print paper/cardstock. The lavendar petals were colored with Tombow marker and then I painted a layer of Heavenly White Twinkling H2O's over them to give them a little zip. I went over the stem/flourish with Crystal Stickles. Added a little ribbon and voila! I think this turned out to be the favorite card in class.
This was a fun card to create. The print paper and cardstocks for the layering are from Bo Bunny. The base card is a tone on tone white textured cardstock that we order from one of our local suppliers. I just love layering and this card has 5 layers plus the base card. The stamps are from The Feather Flourish set from Stampendous. I used Graphite Black Brilliance ink and Pink Azalea, Sunburst and True Blue Twinkling H2O's for the body of the bird. I wrapped 12" of fibers around my finger and punched a 1/8"hole in the tail of the bird an inserted the fibers and taped them down on the backside of the image. I embellished with a little Stickles on the bird and a turn mount and brad.
Tomorrow, I will upload card #3.
I had a great time creating this card. The "hello" bird card is 5" x 7". I used Bazzill cardstock for the teal card and aqua layer. For the bird panel I used 120# cold press watercolor paper. The bird was stamped with Bark Versacolor ink and colored with Twinkling H2O's. I wet the body of the bird with water before I applied the color. This helps the colors blend a little better. The "hello" is from a Hero Arts set. The stamp actually says " A warm hello" but I needed a smaller stamp for the space, so I just inked part of the stamp. After the card was complete I went over all of the Bark lines with a Stardust Pen. I love the way the pen gives it that little extra shimmer. The stamp set used is called Feather Flourish and is from Stampendous.I just love the Marvy Scallops. For my class tomorrow, we are partying with a punch.....I will use circles, squares and ovals and the Hampton Arts Best Birthday clear set. If you want them too, you can get them here.
For the first card I used the following goodies:
Paper: Tres Jolie
Stamps: Hampton Arts
Ink: Cardinal VersaColor
Bling: Diamond Stickles
Ribbon: Red/White Stripe
Punches: Mega and Super Jumbo Circles


