Admin Control Panel

New Post Change Layout Sign Out
Showing posts with label Silhouette Cameo. Show all posts

Wednesday, December 3, 2014

Paper Crafts & Scrapbooking Magazine Farewell Blog Hop

This is my second post today, please scroll down to find my Repeat Impressions post


It is time to say goodbye to the end of another era....the era of Paper Crafts and Scrapbooking Magazine.

You should have arrived at my blog from Chunyuan Wu's blog, but if you didn't you can  click the Inlinks link below to start from the beginning.

I am not going to go on and on as we all know that Paper Crafts has done so much for the rubberstamping/papercrafting community, industry and its designers. 

You will be missed by many.

To say THANK YOU I have created a few cards from quick and easy to lots of layers to share my GRATITUDE for the fine folks at Paper Crafts and Scrapbooking Magazine.

Now, on with the show:
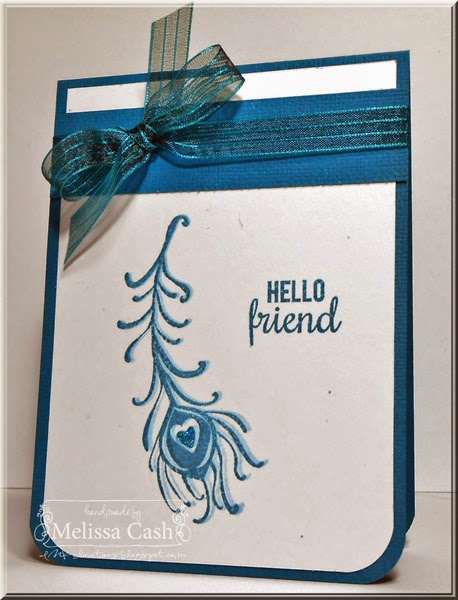

Products used:
Stamps:  Reverse Confetti
Ink:  Memento Teal Zeal
Cardstock:  Bazzill, Neenah
Extras:  Ribbon, Glitter Glue


Products used:
Images:  Silhouette Cut Files
Cardstocks:  Neenah, Bazzill
Extras:  Crafter's Companion Chevron Embossalicious 6 x 6 Folder, Cuttlebug Dots Embossing Folder, Glitter Glue, Glossy Accents


Products used:
Stamps:  Crafter's Companion Barkley Everyday--Special Friend
Cardstocks:  Bazzill, Spectrum Noir Premium White Cardstock, Stash
Coloring:  Spectrum Noir Markers: BG1, BG2, BG3, BG4, CR8, DG2, EB3,GB1, IB1, PP1, TB2, TB4, TN7
Extras:  Twine, Flowers, Wink of Stella, Glossy Accents


I hope you have enjoyed my creations, now I am going to send you on to Annette Allen's blog.


Wednesday, January 1, 2014

Top 13 of 2013

Hi there and happy 2014!


Operation Write Home is having a hop where each person can share their Top 13 cards/projects for 2013.

Now all of my projects may not be OWH cards and I will note underneath if there is a reason why it wouldn't meet OWH guidelines.  I think this will help the newer OWH card creators to know what can/cannot be used (i.e. glitter, bulk,) for our cards for our Heros. 

If you would like more info on any of the cards posted, please click on the name above the card to be taken to my original blog post.


OMIT the glitter from the heart on this one and it would be a great Valentine or Love card from OWH.  Always remember, no glitter for Operation Write Home.


I loved creating this card, possibly my personal favorite for the whole year.  I loved everything about making this card.


Okay, this is not okay for Operation Write Home but definitely on my favorites list.


This one has some layers, but lays nice and flat.  


This one was created for the Operation Write Home Memorial Day Blog Hop


I loved the way this one turned out, you can definitely tell it was warm outside by all of the bright colors I used :)


Okay, these are just plain fun!  OMIT the glitter from the guitar if you want to create something like this for OWH.  


Another bright and summery card.  If I were to use this for OWH, I would OMIT the glitter and just tie a small knot instead of the bow.


Lots of layers, but not a lot of bulk.  


This one was created for Operation Write Home's World Card Making Day Blog Hop.
Click the link above the card to see a more masculine version.


Lots of layers, but still nice and flat for OWH, OMIT the glitter on the cattails and this would be a great card for OWH.


Love the simplicity of this card, yet it has a little pop to it by using the silver embossing powder on the ornament.  

These were just some of my favorites for the year.  I invite you to stop back by and check out my blog as I love to create and share with you all.


Wednesday, October 9, 2013

Witchy Kitty

Happy Wednesday! Fall is definitely here.  The weatherman says we might have a little rain this afternoon.  We need the rain for sure, but the cold can stay away.  

It is time for another Repeat Impressions Designers Choice Challenge on The House That Stamps Built blog and my fellow RI Rock Star. Geri has challenged us to create a Halloween card.  Being the newbie on the team, I did not have a Halloween stamp, so I had to put my thinking cap on for this one.


I used the Repeat Impressions, Peaceful Observation #2001-M to create my card.  This kitty is actually looking through a window at falling snow.  I put my thinking cap on and cut out the windows, added a starry background and witches hat that I had cut with my Silhouette and voila...I have a witchy kitty!

Be sure to stop by each Rock Star's blog today and check out their amazing creations.


Why don't you join us?  Challenge a friend - then link your card on Wendy's blog, The 
House That Stamps Built and Wendy will have a random drawing and that person will win a great gift certificate from Repeat Impressions --- can't wait to see all your creations using the challenge this week.


Thursday, July 4, 2013

OWH/Tombow Blog Skip

Happy, happy 4th of July to each and every one of you.  

Today, The Operation Write Home Team and the Tombow Blog Team have joined forces to bring you a Patriotic blogskip.


You should have arrived at my blog from Nancy's blog, if you didn't you can head back to the Operation Write Home Stars and Stamps Blog and start from there. 

The layout for my card was inpired by the Operation Write Home sketch #36.  You will find the sketch here


I created a card that would be great for any soldier to send to a friend back home.  I started with a white card base and then added some Bo Bunny print papers using Tombow Mono Adhesive Dots.  Next, I cut a large star from red cardstock and a medium star from white cardstock using my Silhouette.  I embossed the red layer with a folder from Lifestyle Crafts.  I used some more Tombow Mono Adhesive Dots to adhere each of these layers together and then used some Tombow Foam Tabs to add the dark blue panel to the card front.  

I stamped the sentiment from the Reverse Confetti Peacock Pretties set in dark blue ink onto a white circle and layered it to red and blue panels using Tombow Mono Adhesive Dots.  The blue panel was popped up using Tombow Foam Tabs.

Now, you have made it this far....how about a chance to win these (see below) awesome adhesives from Tombow.  Be sure to comment on each stop along the way. 


Now, I am going to send you skipping along to Paula's blog.  I know she will have some amazing eye candy for you!

Happy Independence Day!


Monday, March 25, 2013

Happy Spring

Hey there!  It is ABC (anything but a card) week again at Tombow and this week we are having a fun hop with PRIZES!

If you arrived at my blog from Debbie's amazing blog, you are right on track.  If not, be sure to pop on over to Debbie's blog and leave her a comment for a chance to win an amazing prize pack from Tombow.


I created this adorable Watering Can from a Silhouette cut file by Snapdragon Snippets.  I used Tombow Mono Multi to adhere all of the print panels to the can and to create the can itself.  The pretty flowers are also a Silhouette cut file from Snapdragon Snippets. You can find it here.  The flower comes with two sets of petals, if you use one your flower will look like a tulip.  I put both together and I think my flowers look a bit more like a rose. :)
I added the Happy Spring cut out (also from the Silhouette store) with a bit more Tombow Mono Multi.  The panels for the sentiment are adhered together with Tombow Stamp Runner and then the whole panel is popped up with Tombow Foam Tabs.


For a few finishing touches, I added some colored flat droplets to the spout using some Tombow Mono Multi, a tiny pink rose to the front with a 1/4 of a Tombow Power Tab to hold it in place and an assortment of May Arts ribbons to the handle.  

Be sure to stop by each of the blogs along the hop and check out the amazing projects  from the rest of my Tombow teamies and our Guest Designer, Michelle.  Don't forget to comment along the way for your chance to win the amazing prize package shown below.


Melissa (you are here)
Michelle (Guest Designer)


The winner will be announced on the Tombow Blog and FB page on Wednesday April 3rd at 3:30 Eastern Time. 


Friday, January 25, 2013

Be Mine Valentine Boxes

Happy Friday!  This week on the Tombow blog the DT has been creating ABC (anything but a card) and I am sharing a couple of Valentine treat boxes that I will fill with little candies.


The boxes were cut using a Silhouette cut file.  I used Tombow Mono Multi on the side flap of the box and held it for a count of 10 and this was perfect to hold the box closed.  The bottom of the box has flaps that fold into little slots, but I wanted to make sure that nothing would fall out the bottom so I added a little Mono Multi between the flaps just to be sure that the bottom was secure.


For this box, I stamped the heart from the Gourmet Rubber Stamps  Elegant Valentine with some red ink onto a scrap of white cardstock and then over stamped with the sentiment (from the same set) in black ink and then cut out with my Petite Oval Nestabilities and adhered with a Tombow Foam Tab.  For the lace knot, I cut a Tombow Power Tab in half and secured the ribbon to the box.  That baby isn't going anywhere! :)


For this box, I did the same procedure for the Be My Valentine panel except for I used Circle and Lacy Circle Nestabilities dies.  Before I added the sentiment panel, I used some Tombow Mono Adhesive Dots onto the backside of the lace and then wrapped it all of the way around the box.  The sentiment panel is popped up onto a Tombow Foam Tab.


Friday, December 7, 2012

Tag, you're it!!

Happy, happy end of the week!  It has been a busy week for me and I am glad to take a breather and enjoy some downtime.

I am still in "little gifts" mode and made some chocolate dipped sugar cookies with different types of Christmas sprinkles and then packaged them two to a bag and tied them off with some fun holiday tags.  I have added these to my treats basket and they are ready to go.


For each one of the tags, I used the awesome Fancy Pants Blissful Blizzard line.  I love everything about this line as it lends itself to everything from whimsy to elegant.  Each tag measures 2.5" x 4".


This tag was easy peasy as the paper is printed with all of the little elements on it and all I needed to do was add the print tag to a base tag using some Tombow Mono Adhesive Dots.  I wrapped some twine around the tag and then tied it off with a button and bow.  I added a Tombow Power Tab behind the button to hold it firmly in place. I used a little more twine and a smaller button to attach the tag to the bag. I stamped the to/from from the Paper Smooches Word Salad set and Merry Christmas from the Christmas Sampler set.


The next two tags were created just like the first in that I adhered the print piece to the solid using Tombow Mono Adhesive Dots.  The accent stripes on both tags are from the Blissful Blizzard Tape Stickers sheet.  The tape stickers were self adhesive but just to be sure that they would not come up I added some Tombow Mono Multi to each strip.  I cut the poinsettias out with my Silhouette Cameo and this file.  The leaves are cut from this one and that one.  I used Tombow Mono Multi to attach the leaves and Tombow Power Tabs to attach the flowers.  The tags were tied to the bags with twine.

 Remember crafters, don't forget your package delivery people, little gifts like this are the perfect way to say thank you for their awesome service.

Monday, October 22, 2012

Winter Wishes

Good Monday Morning!  I woke up to the rain!  I am not a big fan of rain, especially when I have to go out in it but we really need this rain so I am happy to see it.
I guess it is time to cook some chili or maybe a big pot of chicken and dumplings.  Yum!

The card I am sharing with you today is for the new Case this Sketch Challenge.  Below you will see sketch #2.


My card was quick and easy to make.  I started with a base of white cardstock and cut a smaller layer at 4" x 5 1/4" and punched out a large snowflake, ran it through a snowflake embossing folder, glittered the postitive snowflake image and popped it up right back into the negative space that it came out of.  I added a little flag with "winter wishes" from the GKD Snowman Wishes mini set.

Here is the sketch:  


Isn't this sketch great?  I can't wait to see what #3 looks like.


Tuesday, October 16, 2012

Trick or Treat BLD Style

Tricky, treaty Tuesday y'all!

Our Tuesday post over at By LORi Designs is to trick or treat ya.  Well, I am no magician so I am hoping that my card will be a little treat for you.

To play along with the BLD31 Trick or Treat Challenge, click HERE


This week I am using the adorable Marvin Mummy image from By LORi Designs.  I have paired it up with some print cardstock from Bazzill and some solids from American Crafts. The cool spidey webs are from this Silhouette cut file.  

Be sure to check out the By LORi Designs blog today and check out the tricks and treats my fellow teammates are sharing.

Friday, October 12, 2012

Notecard Box


Hi there!  I hope this finds you looking forward to the weekend.  We have finally gotten into some cooler weather and that is a good thing.  

Today I am sharing a notecard box and one of four notecards/envelopes that fit nicely inside.  I am giving these to someone special.  I know she will love them.


I cut this envelope box diecut with my Silhouette Cameo out of some American Crafts textured cardstock and used Tombow Mono Multi Adhesive on the glue tabs and the bottom envelope flap to hold the box closed.  Tombow Mono Multi is great when you need to glue paper to paper and you need it to take hold quickly.  To add all of the paper layers I used Tombow Mono Adhesive Dots.  


Here is the closure side of the box.  I used a Tombow Fastener Tab on the flap to allow the box to be opened and closed.  These tabs are self adhesive which makes them very easy to place just where you need them.


Related Posts Plugin for WordPress, Blogger...

Current Design Teams

Crafters Companion

Repeat Impressions

Repeat Impressions
 

Past Design Teams

Tombow

Tombow

Tombow

Tombow

Tombow

Tombow

By Lori Designs

By Lori Designs

Gina K Designs Center Stage Alumni Team

Gina K Designs Center Stage Alumni Team

Our Craft Lounge

Our Craft Lounge

Outlawz

Outlawz
Outlawz
 

Guest Designer

Melanie Muenchinger Spring Basket Set February 2011

Melanie Muenchinger Spring Basket Set February 2011

Tami Mayberry Hopeful Hearts Set January 2011

Tami Mayberry Hopeful Hearts Set January 2011

May & October 2009 Gina K Designs Center Stage Designer

May & October 2009 Gina K Designs Center Stage Designer
 

Featured

Fetti Fave

Fetti Fave
May 2013

Fetti Find

Fetti Find
May 2013

TPE Winner

TPE Winner
10/3/2012

by LORi designs Winner

CR84FN


This blog has been Tweaked and Designed by Sara Williams | Powered by Blogger | Back to top
 
Pin It button on image hover